In this tutorial, you will learn how to create a master-detail form in Oracle Apex based on SCOTT schema’s EMP and DEPT tables.
If you don’t have the SCOTT schema installed, or do you need only the EMP and DEPT tables, then you can download it from the following link: Download Scott Schema.
Creating Master-Detail form in Oracle Apex
Follow these steps in Oracle Apex to create a master-detail form:
Step 1: Create a form using wizard
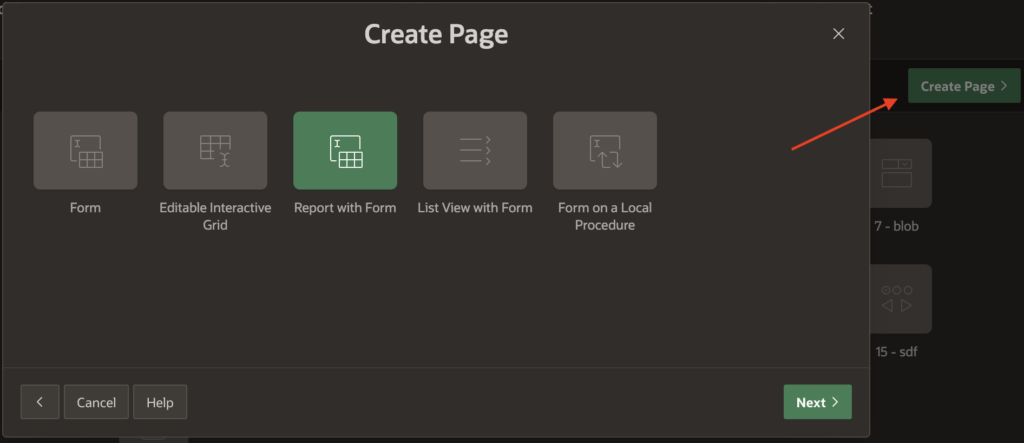
In Oracle Apex, click on the button Create Page then choose Form and then choose Report with Form option and then click on the Next button, as shown in the below image:
Step 2: Specify Page Titles and Page Types
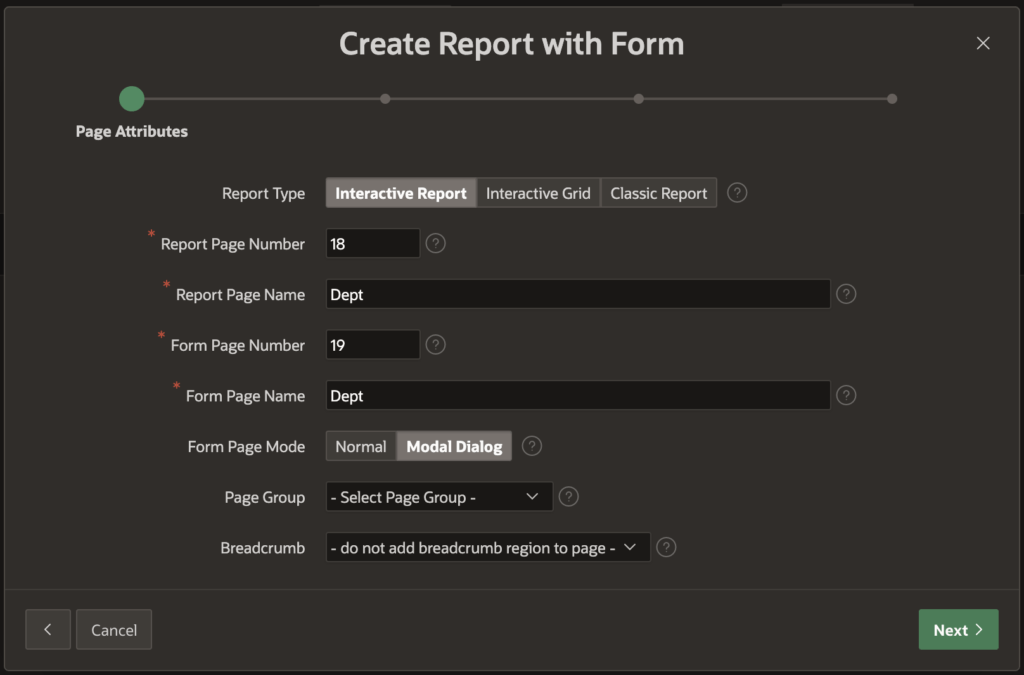
In the next step, specify the report page name and the form page name. Also, specify the form page mode to Modal Dialog.
You can also select the Normal, it depends on your need.
Step 3: Specify Navigation Menu Entry
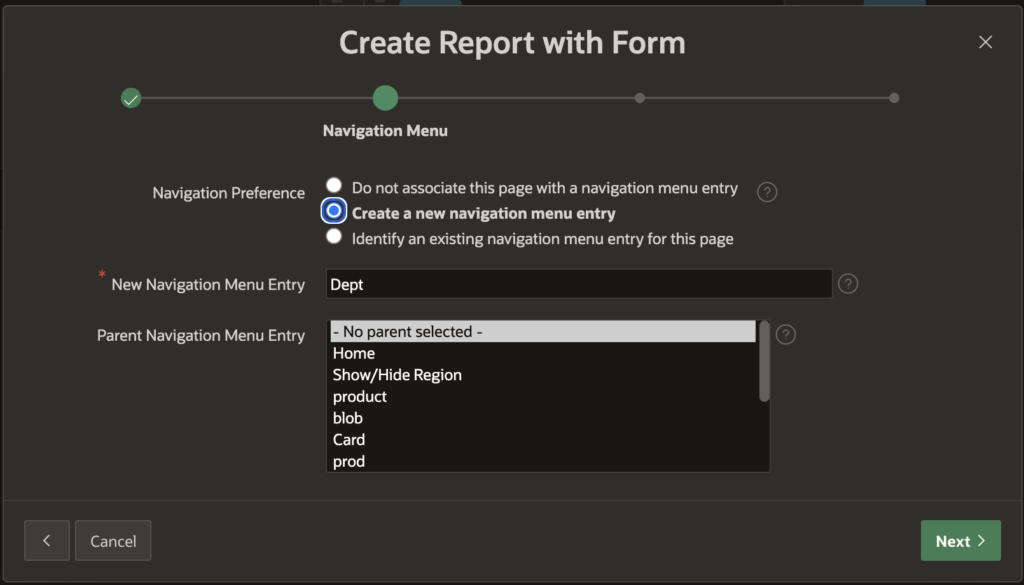
In the third step, it will ask you, whether to show in the navigation menu or not. Select the option as per your need, then click on the Next button.
Step 4: Specify the Table name
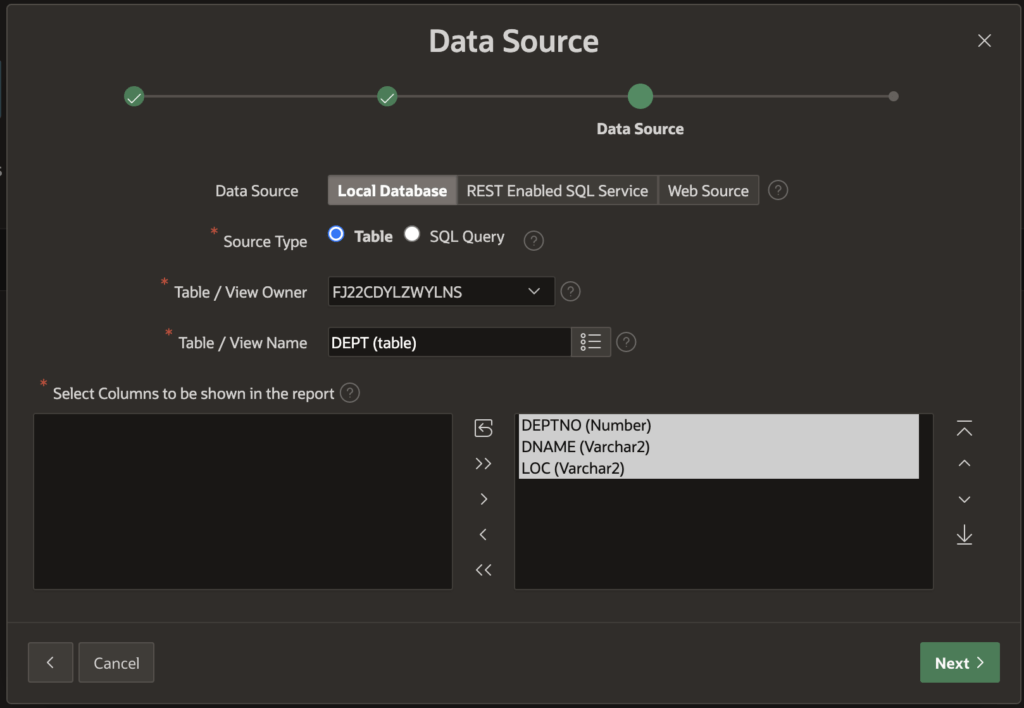
Select the table name DEPT from the table LOV, then click on the Next button.
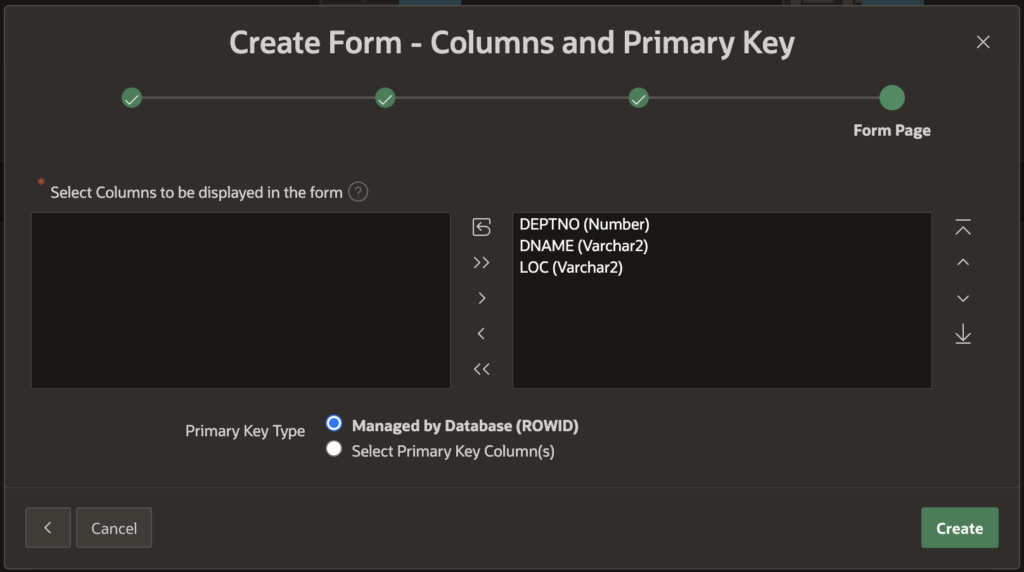
Step 5: Define Primary Key for Master Table
In the fifth step, it will ask you to define the primary key column. Select the option Managed by Database (ROWID), then click on the Next button.
After completing the above 5 steps, you will end-up creating two pages, one is the report page for the DEPT table, from which you can navigate to the second modal dialog form. As shown in the below image:

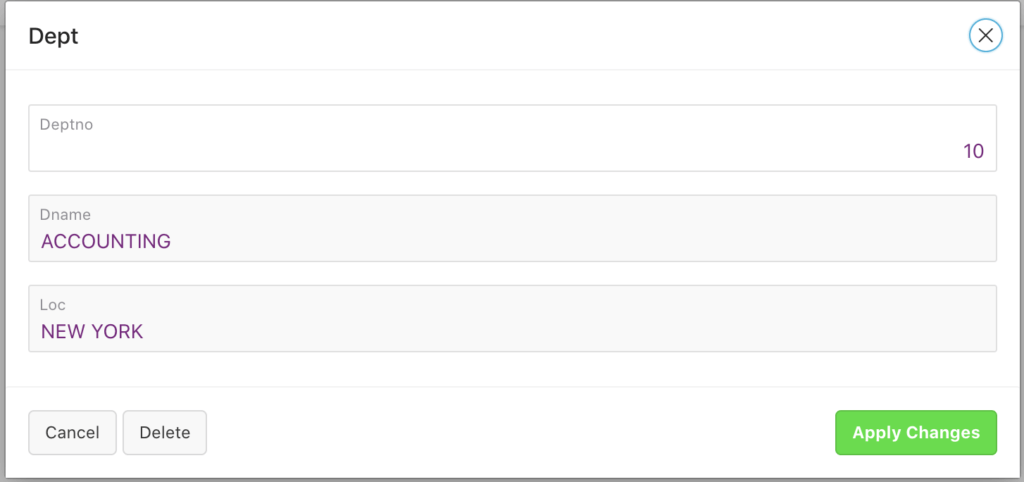
And when you click on the Pencil icon at the left, the modal dialog form will open to display the department details. Below is the screenshot:
Our work not yet finish.
Now we need to display below the employee grid for the selected department.
To do this, open the above dialog page in page designer and follow below steps:
Step 6: Create a Region for Detail Table
Do the right-click on the Dept region node and select the option Create Region from the shortcut menu. Below is the screenshot:
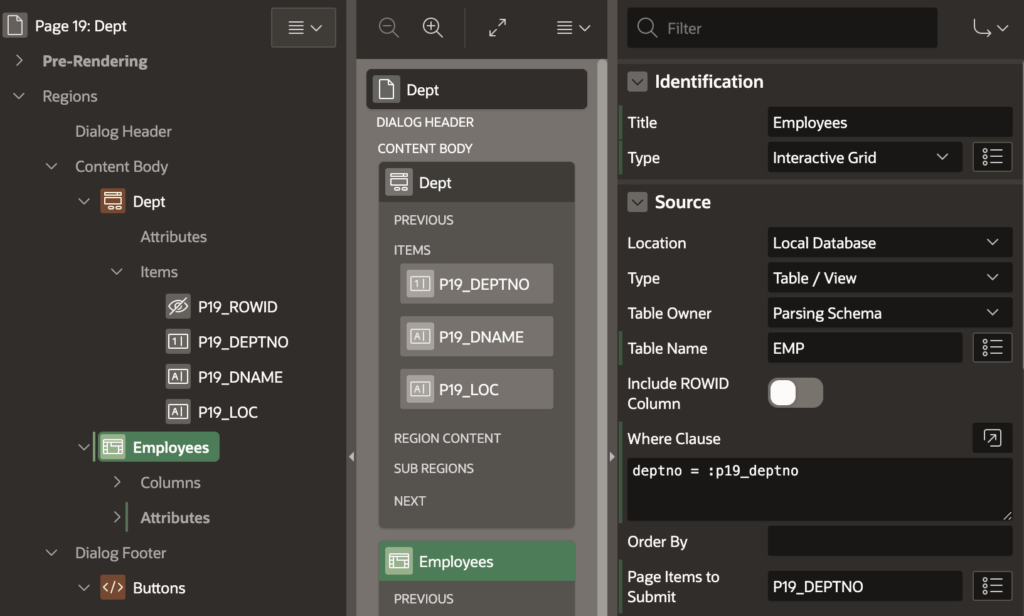
Then set the following properties for the new region:
- Title: Employees
- Type: Interactive Grid
- Type: Table
- Table Name: EMP
- Where Clause: deptno = :P19_DEPTNO
- Page Items to Submit: P19_DEPTNO
Change the item name P19_DEPTNO according to your page item.
Step 7: Make Interactive Grid Editable
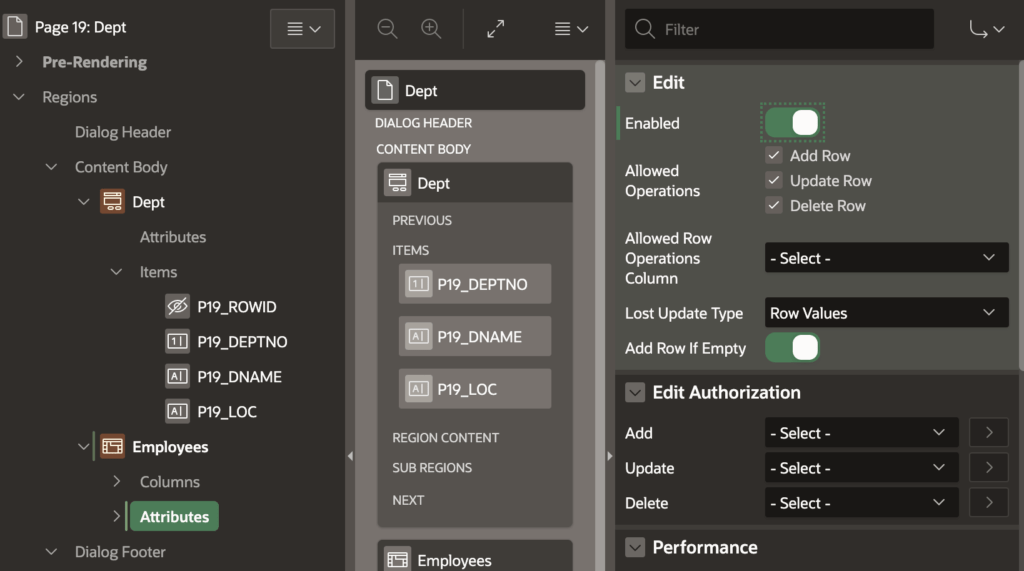
Make the interactive grid for employees editable.
To do this, click on the Attribute node and turn on the Edit > Enabled button at the right side, as shown in the below image:
Step 8: Remove the Interactive Grid Save Button
We will use single save button to save both master and detail information.
And one save button have been already created for the DEPT form.
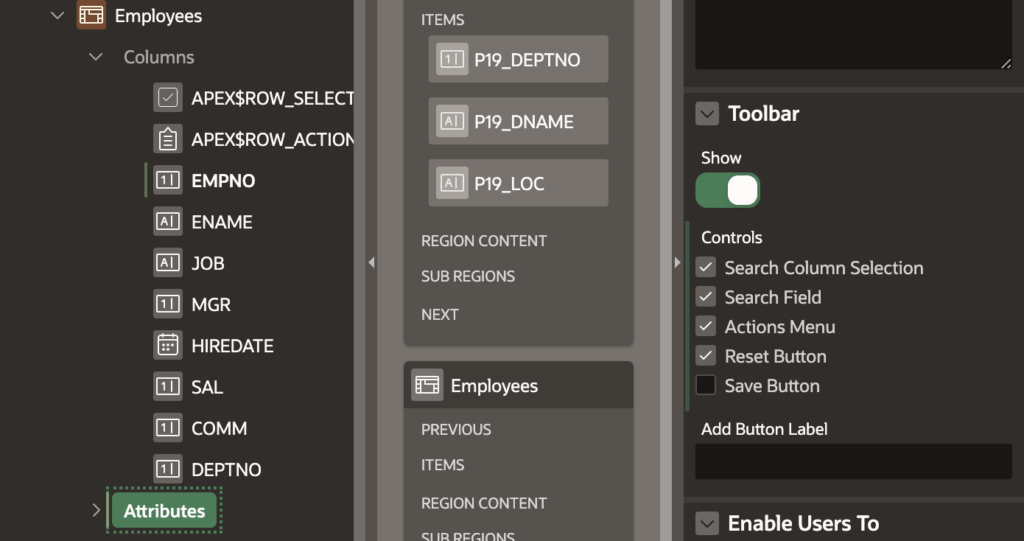
So remove the Save button from the interactive grid.
To do this, in the attributes, scroll down to the Toolbar section and uncheck the Save button option, as shown in the below image:
Step 9: Define Primary Key for the Detail Section
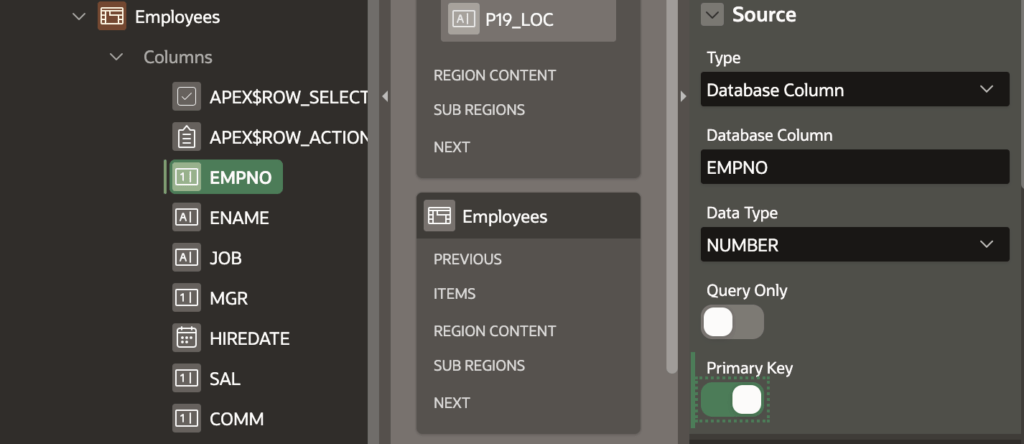
The primary key should be defined for the detail table. So select the EMPNO column and right side turn on the Primary Key button.
Suppose, you have included the ROWID for the detail table, then no need to select the primary key. Because column ROWID is by default set as the primary key.
Step 10: Set the Default DEPTNO for Detail Table
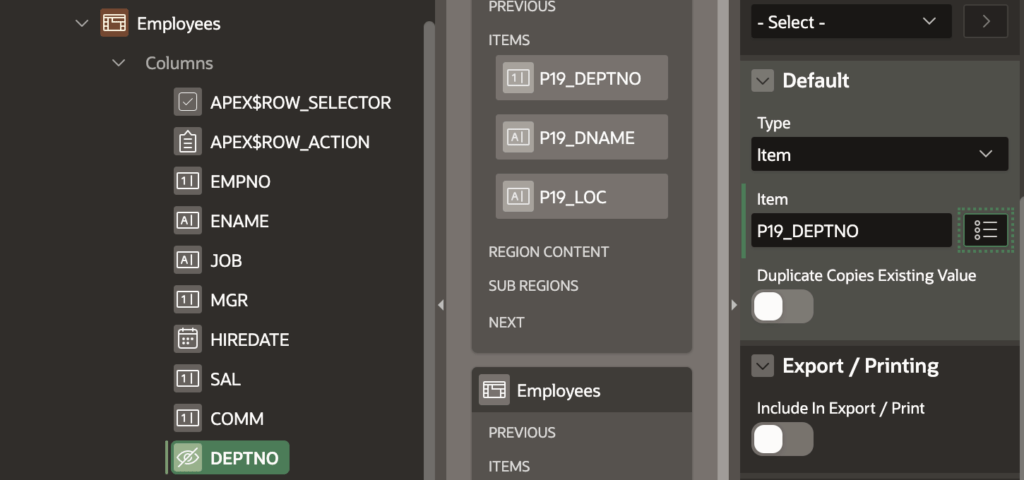
For the detail table employee set the P19_DEPTNO as a default value for the interactive grid column DEPTNO. So that every time when a new record created in the EMP table, the current DEPTNO can be saved. Below is the screenshot:
Step 11: Assign A Static ID to Interactive Grid
Click on the interactive grid region, scroll down the right side to the Advanced section and specify the static id igemp in the field, as shown in the below image:

Step 12: Create a Dynamic Action for Before Submit
Create a dynamic action for event Before Submit to execute the JavaScript code and add the following JavaScript code:
var n_deptno;

n_deptno = $v("P19_DEPTNO");
var model = apex.region("igemp").widget().interactiveGrid("getViews", "grid").model;
model.forEach(function(igrow) {
     model.setValue(igrow, 'DEPTNO', n_deptno);
});
The above JS code will update the interactive grid column DEPTNO to the current P19_DEPTNO item value for the records. Change the item name according to your page. Below is the screenshot:

Step 13: Set Process order
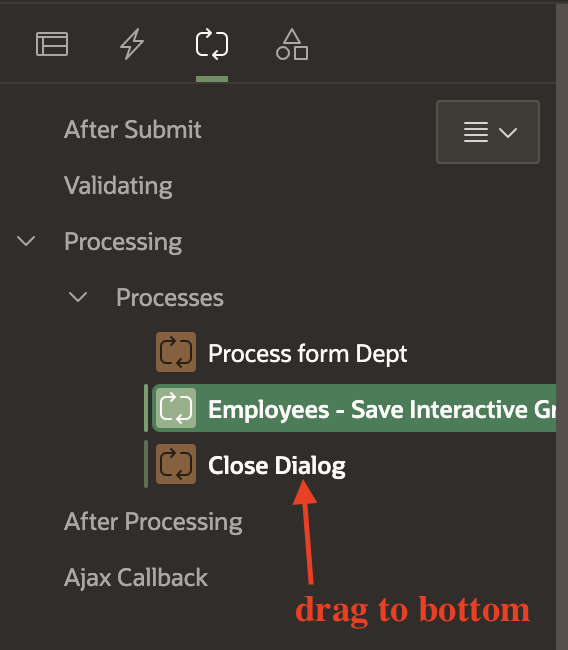
Now click on the Process tab, and make sure the Close Dialog process is at the bottom, if not, drag it to the bottom last.
Now you are all set.
Save the changes and run the main department report page.
You will have output as shown below:
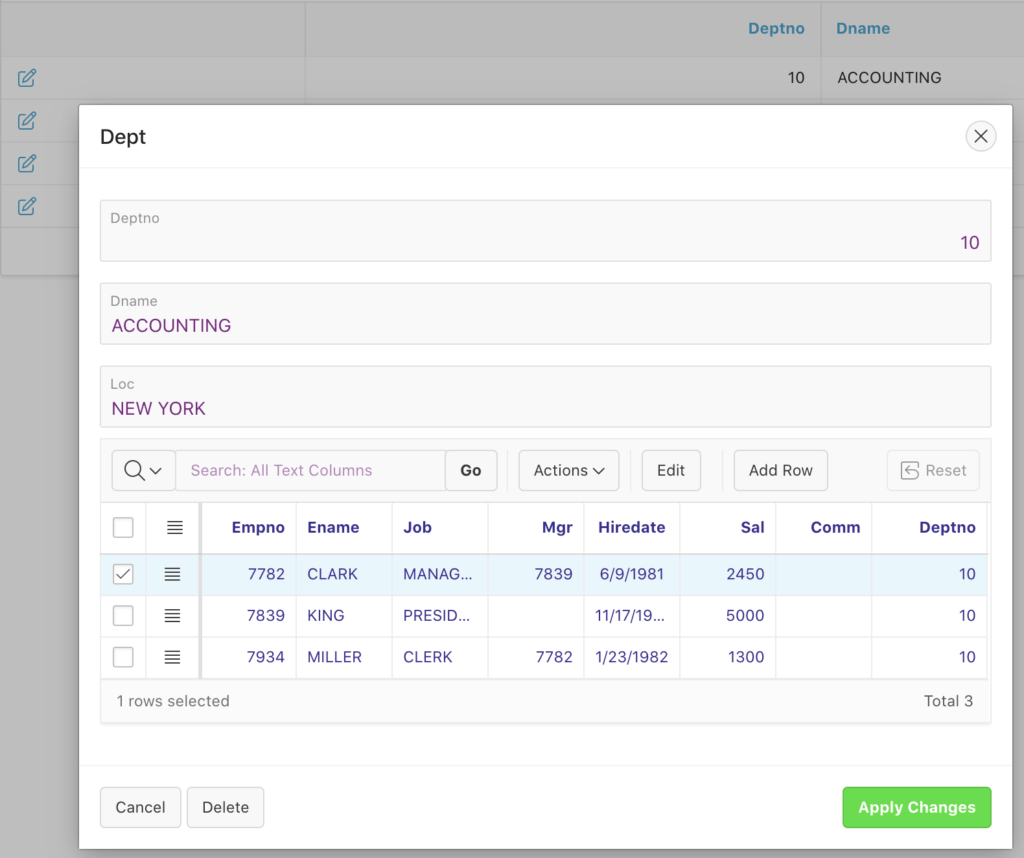
Now, if you will open the ACCOUNTING department, it will show all the employees under the ACCOUNTING department.
And you can make the changes in both the master-detail section and on the click of the Apply Changes button, it will save all the changes and will close the dialog.
But if you want that the window should not be closed until the user presses the Cancel or close button from the title bar, follow below steps:
Click on the Process tab.
Click on the close dialog process and set the server-side condition for the Delete button only, as shown in the below image:

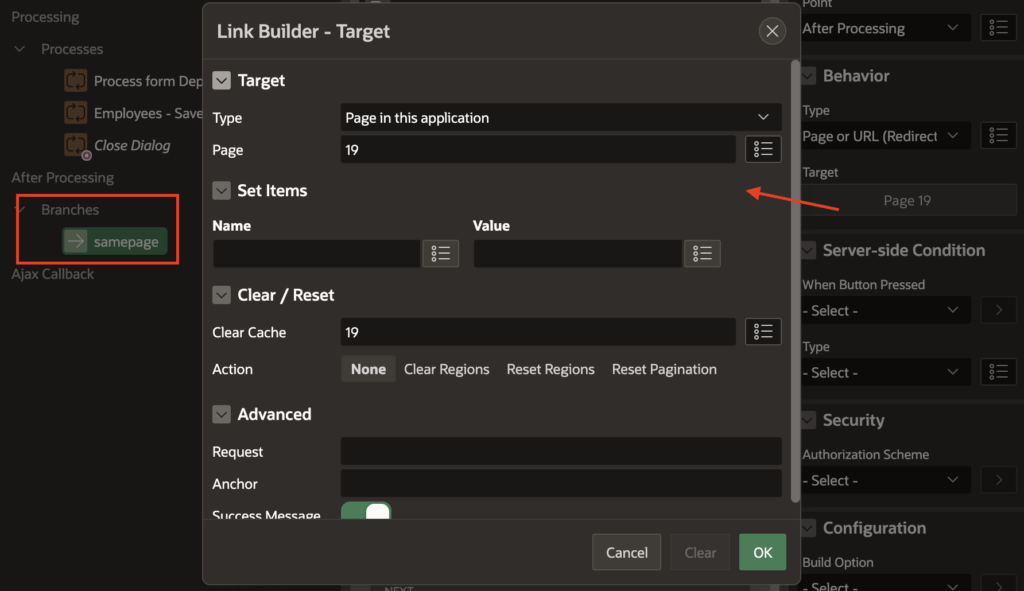
Now do the right-click on the after processing node, and create a branch process, and set the link property to call the same page (19), as shown in the below image:
What if I created FORM_KEY as hidden item then synchronize it with grid GRID_KEY also hidden item once the form saved I will insert the max(column)+1 and the FROM_KEY at the same time then I initialize the form using FORM_KEY
then show IG details that has GRID_KEY that has the same data from FORM_KEY
Yes, you can try this.
There is way but I tried to make it but I could not do it I tried to hide the detail once the master created and saved the details will be shown for the user to enter the data the problem is how I know the number that I used for the master if I used DB trigger how I get this number if you have any advice regarding that I would be very thankful
Yes, that approach is also fine, where you save the master data first and then display the grid. In this case, you will get the master key value, which you can assign as the default value for the grid column.
The grid column default value type to the item and specify the master form item.
You will have to get the master key value on the form and assign it to the grid FK column. Forget the trigger in this case.
Hi Vinish
I the master details working fine but when I try to delete any record from the IG Details there is error message
Uncaught Error: Set value not allowed for record.
at Object.setValue (interactiveGrid.min.js?v=20.1.0.00.13:1)
Also I have another question what if there are many users working with the same master details at the same time and in this time all users will get same sequence number
So what is the best practice in this case
For the error, if you are using the sequence object, remove the DA created in 12th step to execute the JavaScript code.
For the second question, if you are using the sequence object, it will not be duplicate for any other user.
I’m using Select max(nvl(COLUMN),0) + 1 that’s why I have problem with that
So in normal form I made DB trigger to fix this error but in master detail I used this
Select max(nvl(COLUMN),0) + 1
in the Item default value
You will have to find some other way; this is not the recommended approach.
Try using sequence object only, whether in form or the DB trigger.
How to return multiple value in list of value for Oracle apex 19.1
Please ask as a separate question using Ask Question button.
Hi Vinish,
Further to your tutorial, I have implemented this scenario on my side and it is all working fine for me.
Many thanks for your help and support, really hats off to your work for Apex community.
Hi Vinish,
Just to let you know that it is working fine if I implement exactly same steps as you have mentioned in your tutorial and where DEPTNO is manually entered but it is not working if DEPTNO is auto generated (using NEXTVAL) via trigger.
On Save it raises an error – “Can not Insert NULL into EMP.DEPTNO”
In this case, the whole logic changes. But to make a shortcut, you can follow these steps:
Create a new field (formkey) in the DEPT table.
Create a new field (igkey) in the EMP table.
Create a sequence deptfrmkey.
On the dialog screen, for the DEPT table, make this field hidden and set the default value as sequence and give the name of the sequence. Also, you can use the SQL query, for example, select deptfrmkey.nextval from dual.
In the EMP grid, synchronize columns, and make the igkey field hidden and set the default value as item DEPT table formkey.
Change the before submit DA as following
var n_deptno;

n_deptno = $v("P19_FORMKEY");
var model = apex.region("igemp").widget().interactiveGrid("getViews", "grid").model;
model.forEach(function(igrow) {
     model.setValue(igrow, 'IGKEY', n_deptno);
});
Now for new records, the default value will populated for DEPT table and it will be copied to EMP table igkey.
Now create a before insert trigger on the EMP table to get the deptno on behalf of the igkey. Below is an example:
This is the tested method and works perfectly.
Please let me know for any further questions.
Hi Vinish,
I have implemented the new steps as you have suggested.
It is all working fine for me.
Many thanks for your all support and help and providing the solution in your busy schedule.
You are welcome.
Hi Vinish, Many thanks for creating a tutorial on Master-Detail form in a step-by-step approach. That’s why I like your blogs and various apex tutorials, anyone can easily understand. Salute to your hard work.
I have little change in my requirement. How to create data entry form without a report page on DEPT? i.e. need to start from DML page.
So my landing page would be a blank DML page (rather than Report page) where a user can enter a department info on the top form section then employees details below in IG for that department at the same time, Save the page and clear out all field contents on whole page (Top Section and below in IG) and ready for the next department/employees record.
Would it be possible? Your help would be greatly appreciated.
Hi Bhavin,
I have added a few more steps in the above post. Now to match your requirement follow these steps:
Follow the whole steps of the above post, then delete the report page, which you don’t require.
Now call that dialog page through any navigation menu option or on the click of a button.
A blank window will appear in which the user can enter the new record in the master and detail section, as shown in the below image:
And after clicking on the Create button, it will save both section data, and the window will remain open and will let the user enter another set of records. Below is the screenshot:
Please let me know if any questions.
Hello Vinish,
Many thanks for providing the further steps to match my requirements.
I will do accordingly and update you asap.
Hi Bhavin,
Thank you so much.
And yes, it is possible for what you are asking for.
I will soon share the solution on this comment thread only.
Regards,
Vinish